Perspectives Of An Object
|
|
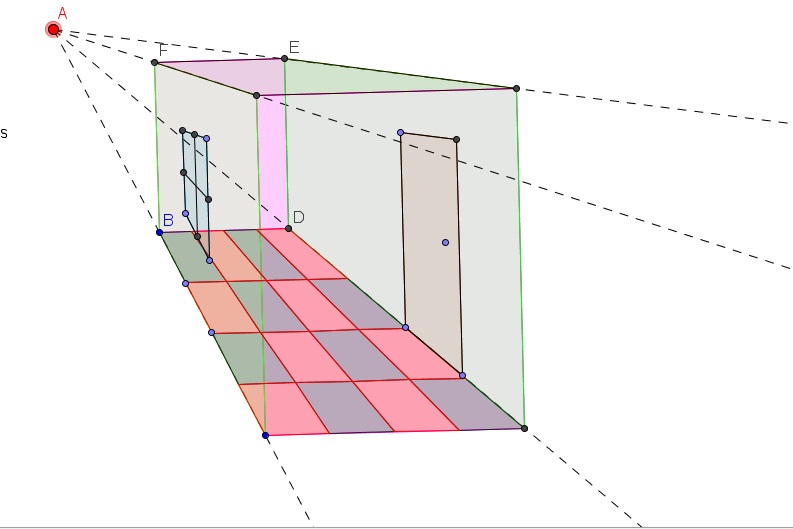
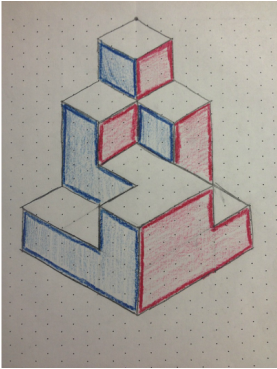
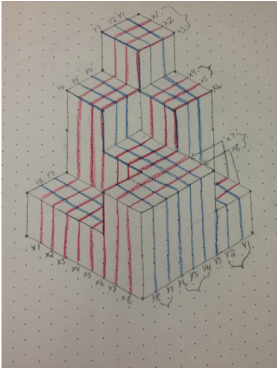
One Point Perspective
|
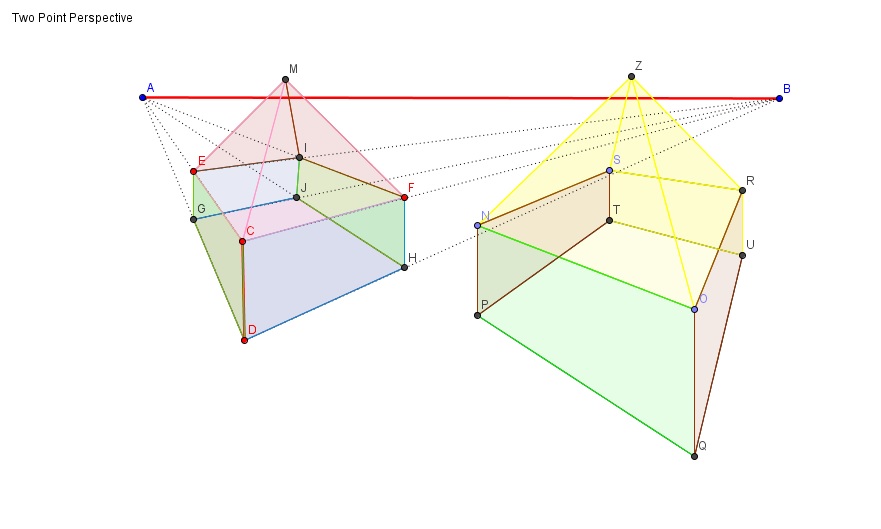
Two Point Perspective |
Anamorphic 3-D Drawing Project
|
|
Project Description
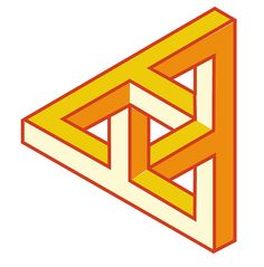
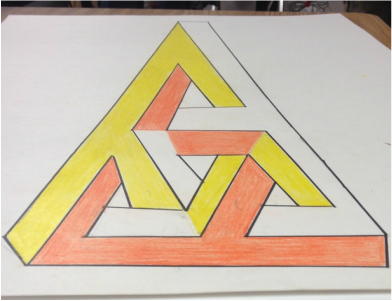
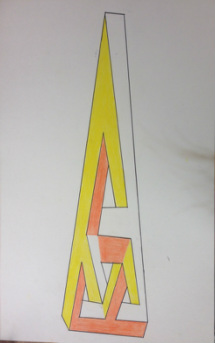
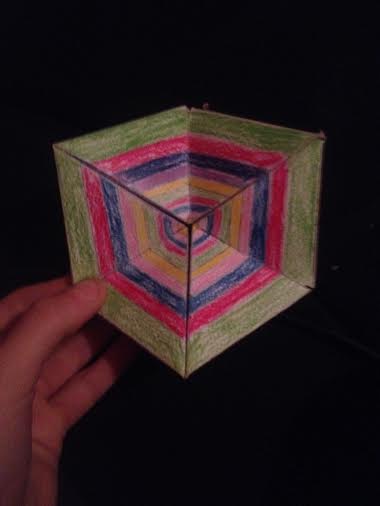
1. Anamorphic drawings are when an image is projected as in drawn, painted etc. onto a flat surface but from one specific location appears proportional and 3D, yet from every other perspective it’s not.
2. To create our drawing with several supplies. Including a poster board, sharpie, beads to mark places, and transparent surface with our original shape drawn on it, and then created a sturdy stand out of a box to hold it.
3. Our anamorphic drawings are a result of projecting because like a projector no matter what kind of an uneven or angled surface the picture that’s being projected is always going to be proportional from the one perspective just like our drawings. We did this by placing one person behind the transparent surface with the original image drawn on, this person acted as the one point of perspective for the drawing and pointed out the shape onto the paper as it appeared from their perspective. Then the other partner used beads to help mark the shape out and then connect the beads to make the final projection of the shape.
4. I believe that the biggest challenges my partner and I came across was just keeping our eyes focused and keeping our shape on the poster lined up with the shape on the transparent surface. With every time you would look away and then then come back the shape would line up differently every time just depending where your head was located so that made it really hard trying to make the hole shape and keep it on point with the original shape. We overcame this by using beads for the point at first instead of drawing then right on that way you could make little adjustments on them as you went on.

|
|
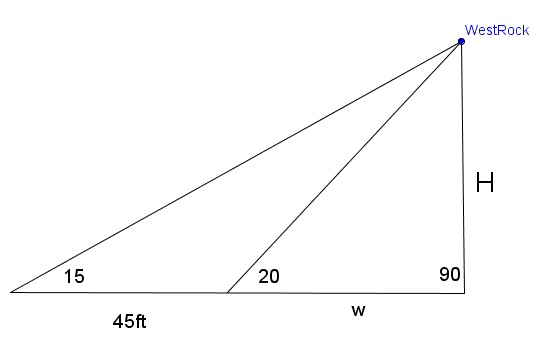
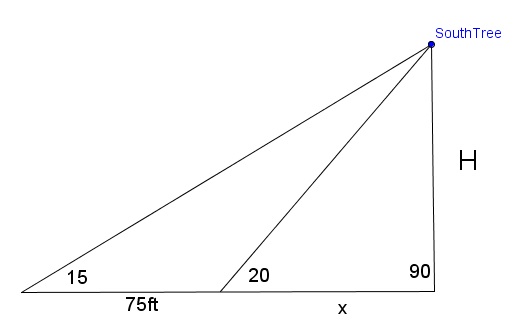
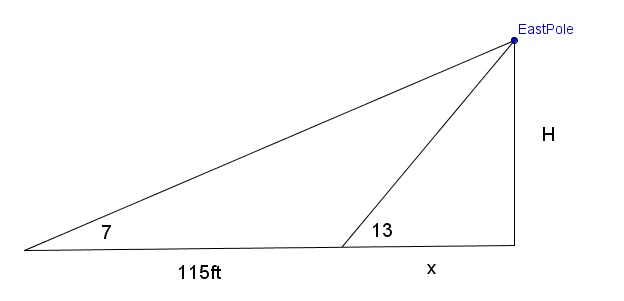
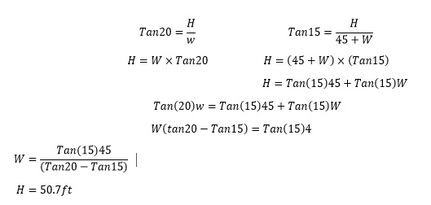
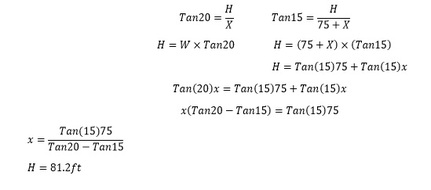
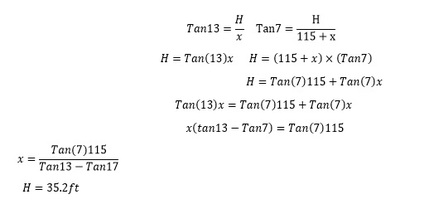
Finding Heights Using Trigonometry

|
|
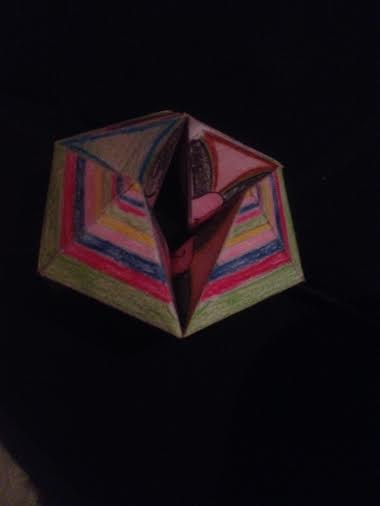
Hexaflexagon
To make this cool 3D paper shape we started out with a pre-made temp let then colored it to so it makes the patters you see bellow. This uses rotational symmetry to create the images. to put it together to allow it to continue folding on its self to show the next pattern we made it into a complex tube looking thing then connected the two ends together creating what you see below.
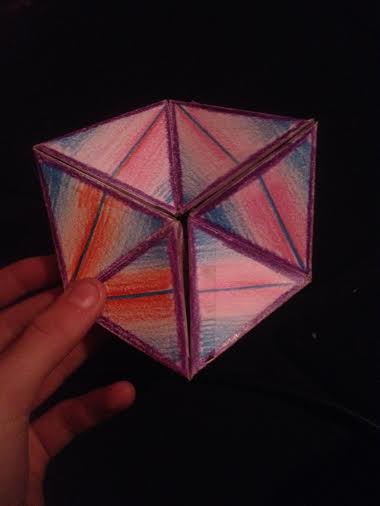
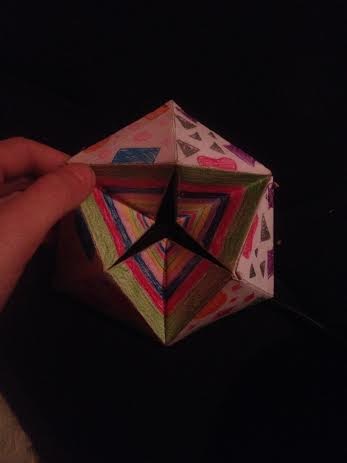
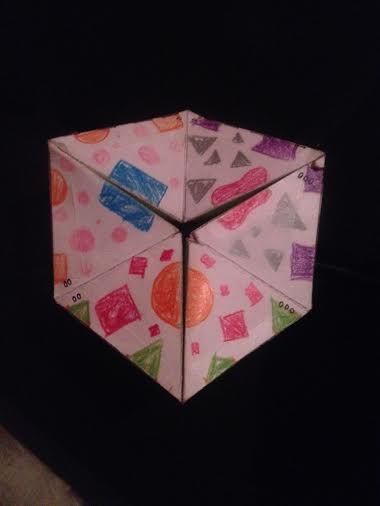
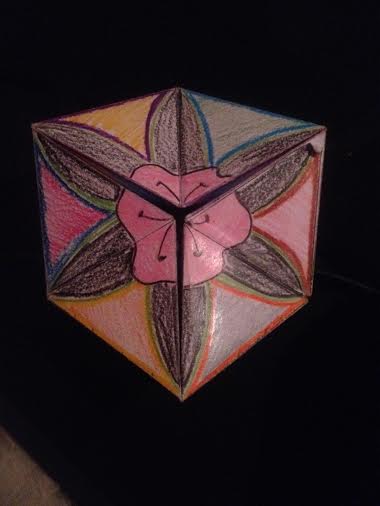
The part of my design that I like the most would be my flower side. It shows the rotational symmetry really well and just turned out really cool in my opinion.
If I was to change anything about coloring my hexaflexagon after doing it would be to make more of my side’s one big design like my flower. It would be cool to be able to create a picture on each side but that would be very hard.
What I learned the most about myself in this project would be that looks can be deceiving. And that I could of never thought of this hexafexagon design up on my own.
Snail-Trail Graffiti GGB Lab
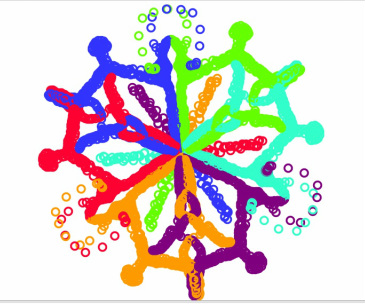
In this lab we used the concepts of reflections and rotational symmetry to create this mathematical art piece. We set it up with 6 dots 60 degrees apart inside a circle when we moved one the rest would mimic and reflect the same movements over the dividers in the circle. when the colored dots moved it would create a line showing its path with the color of the dot.
I relearned in this project a lot about how to work Geogebra and more of what it can do within the program, including the trace tool. This was the tool that allowed me to make the lines of were I moved the dots. in this project I had a hard time with fallowing the instructions step by step. As well even tho I have a good end project I am still confused how I made it or even how it works.
Two Rivers GGB Lab
Description: There is a sewage treatment plant at the point where two rivers meet. You want to build a house near the two rivers (upstream from the sewage plant, naturally), but you want the house to be at least 5 miles from the sewage plant. You
visit each of the rivers to go fishing about the same number of times but being lazy, you want to
minimize the amount of walking you do. You want the sum of the distances from your house to the
two rivers to be minimal, that is, the smallest distance.
OBJECTIVE: In this investigation you will discover the minimum sum of the two distances from a point to two lines.
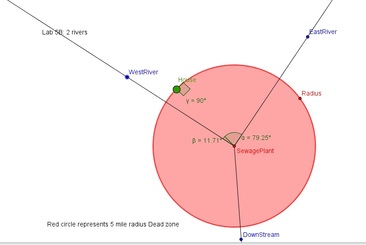
Okay so the green dot represents the location of the house. The red Circle represents the five miles from the sewage plant. And the two lines lines are the two rivers.
The location of this house in incorrect because it is not evenly spaced between the two rivers but it is correctly located five miles from the plant.
The location of this house in incorrect because it is not evenly spaced between the two rivers but it is correctly located five miles from the plant.
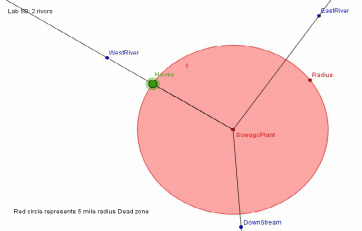
In this picture the house is positioned in a correct location. we used perpendicular bisectors on the 2 rivers to show us the shortest paths to the river from the house. And if you locate the house on one of the rivers the walking distance to the two rivers will be the smallest because you will only have to walk to one and it is a direct route giving you the shortest distance.
The Burning Tent Lab
Description: A camper out for a hike is returning to her campsite. The shortest distance between her and her campsite is along a straight line, but as she approaches her campsite, she sees that her tent is on fire! She must run to the river to fill her canteen, and then run to her tent to put out the fire. What is the shortest path she can take? In this exploration you will investigate the minimal two-part path that goes from a point to a line and then to another point.
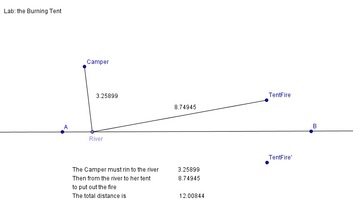
This picture is wrong. The path from camper to river to tent is 12 long compared to the picture on the right that is 10 long
|
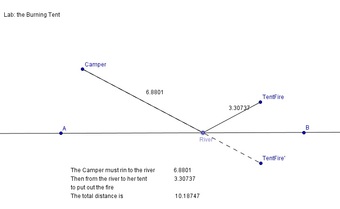
This one is correct. I know that this is the shortest path because the angle from A, River, Camper is the same as angle B, River, Camper. I as well created the dotted line that helped me. I made this by reflecting the path from river to tent over the river line.
|
